Camshaft, Engine: Removal: Removal
WARNING: This page is about a different variant/trim than selected.
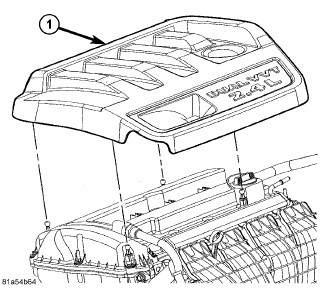
- Remove engine cover (1) by pulling upward.
- Disconnect and isolate the negative battery cable.
- Remove cylinder head cover . Refer to COVER(S), CYLINDER HEAD, REMOVAL .
- Raise and support the vehicle. Refer to HOISTING, STANDARD PROCEDURE .
- Remove the frame cover portion of the right splash shield. Refer to SHIELD, SPLASH, FRONT WHEELHOUSE, REMOVAL .
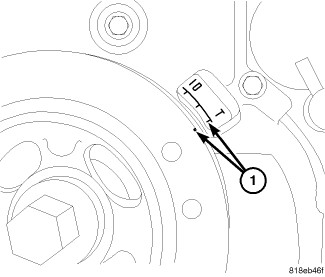
- Rotate engine to TDC (1).
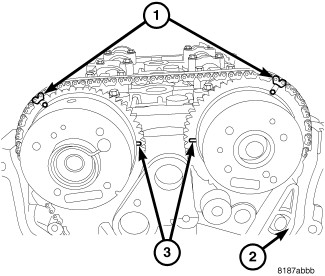
- Make sure camshaft timing marks (3) are in line with the cylinder head cover sealing surface.
- Mark the chain link corresponding to timing marks (1) with a paint marker.
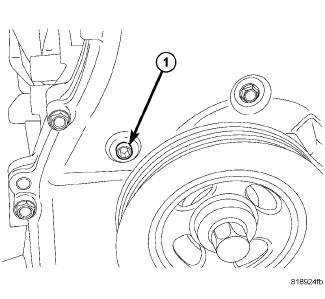
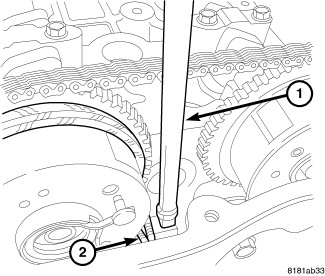
- Remove timing tensioner plug (1) from front cover.
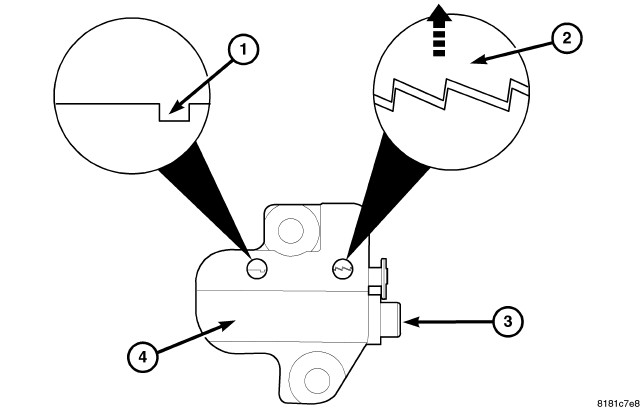
- Insert small Allen wrench through timing tensioner plug hole and lift ratchet (2) upward to release the tensioner and push Allen wrench inward. Leave the Allen wrench installed during the remainder of this procedure.
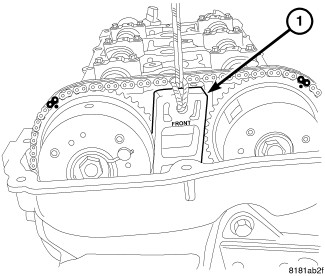
- Insert Locking Wedge (special tool #9701, Wedge, Locking) (1) between camshaft phasers.
- Lightly tap Locking Wedge (special tool #9701, Wedge, Locking) (2) into place until it will no longer sink down.
NOTE:
Camshaft bearing caps should have been marked during engine manufacturing. For example, number one exhaust camshaft bearing is marked "E1>".
CAUTION:DO NOT use a number stamp or a punch to mark camshaft bearing caps. Damage to bearing caps could occur.
- Using a permanent ink or paint marker, identify location and position on each camshaft bearing cap.
- Remove the front camshaft bearing cap.
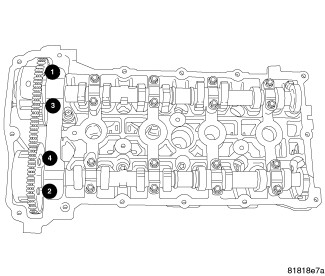
- Slowly remove the remaining intake and exhaust camshaft bearing cap bolts one turn at a time.
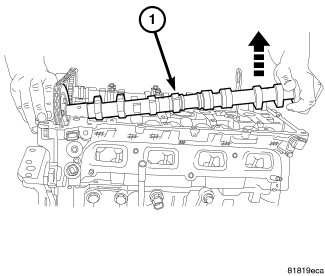
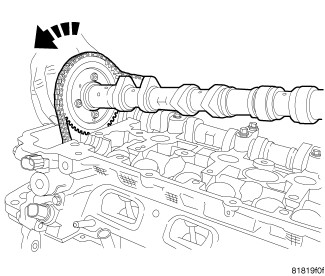
- Remove intake camshaft (1) by lifting the rear of the camshaft upward.
- Rotate the camshaft while lifting out of the front bearing cradle.
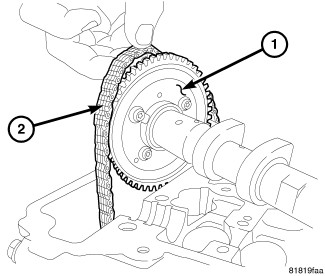
- Lift the timing chain (2) off the sprocket (1).
- Remove exhaust camshaft.
- Secure timing chain with wire so that it does fall into the timing chain cover.