Transfer Gear (Output) Bearing Installation
Use welding gloves or tongs when handling heated components. Failure to follow these instructions will result in personal injury.
A bearing heater is used to assembly some components. Use only a bearing heater/hot plate and follow manufacture's instructions. Heat components to 100° - 150° Celsius (212° Min. - 300° Max Fahrenheit). Never use an open flame to heat components. Never leave components on heater for and extended amount of time. If component is discolored after heating, the component has been overheated and must not be used. Failure to follow these instructions will result in component damage.
If the original bearings or gears are damaged in any way the entire transfer gear output must be replaced.
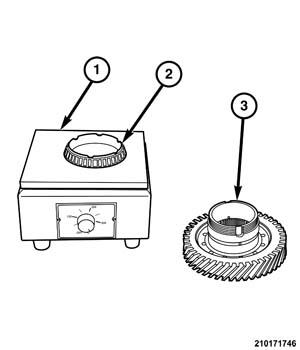
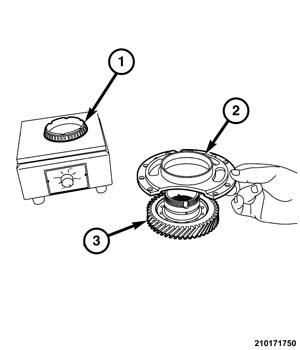
- Using a suitable HOT plate (1), heat the bearing (2) to near 150° C (300° F). Light smoke may be produced as the bearing is heated. Do not allow the bearing to discolor.NOTE:
An infrared thermometer can be used to monitor the temperature of the bearing as it is heated.
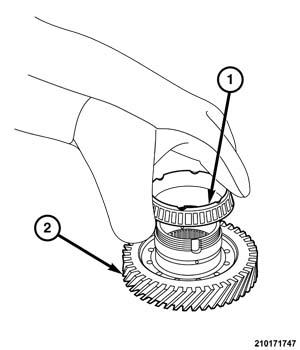
- While wearing welding gloves, Place heated inner bearing (1) onto the transfer gear (2) and allow to cool. If the bearing fails to fall all the way onto the transfer gear, it will need to be removed and reheated.
- While heating the outer bearing (1), place the transfer gear support/race (2) in position on the transfer gear (3).
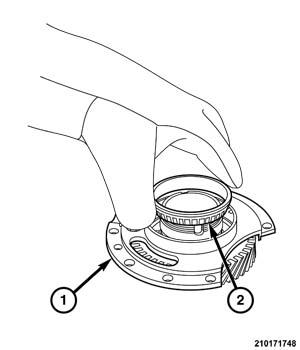
- While wearing welding gloves, Place heated outer bearing (2) onto the transfer gear and allow to cool. If the bearing fails to fall all the way onto the transfer gear, it will need to be removed and reheated.
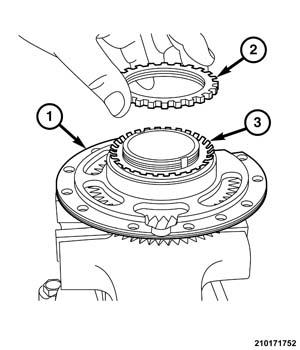
- Install the lock ring and the spanner nut on the transfer gear (output). (special tool #10423, Fixture, Transfer Gear Holding) (special tool #10422, Wrench, Spanner)
- Tighten the spanner nut to specified torque. Refer to SPECIFICATIONS .
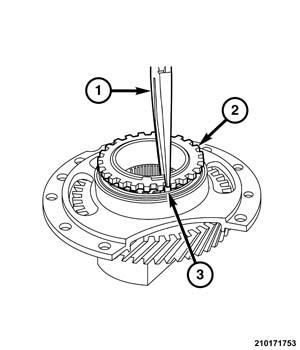
- Using a suitable pliers (1), bend a lock tab into the spanner nut.
- Verify that the bearing turning torque is no greater than 1.3 N.m (12 in. lb.) before installing the transfer gear in the transaxle.