Differential Bearing Preload Adjustment
True bearing turning-torque readings can be obtained only with the geartrain removed from the case.
- Remove bearing cup and existing shim from clutch bellhousing case.
- Press in new bearing cup into bellhousing case (or use a cup that has been ground down on the outer edge for ease of measurement).
- Press in new bearing cup into gear case side.
- Oil differential bearings with transmission fluid. Install differential assembly in transaxle gear case. Install clutch bellhousing over gear case. Install and tighten case bolts to 25 N.m (225 in. lbs.).
- Position transaxle with bellhousing facing down on workbench with C-clamps. Position dial indicator.NOTE:
Position of dial indicator is for illustrative purposes only. The dial indicator should be parallel to T-Handle to obtain the most accurate reading.
- Apply a medium load to differential with Torque Tool (special tool #C-4995A, Tool, Differential Bearing Torque) (3) and a T-handle (1), in the downward direction. Roll differential assembly back and forth a number of times. This will settle the bearings. Zero the dial indicator (2). To obtain end play readings, apply a medium load in an upward direction while rolling differential assembly back and forth. Record end play.
1 - INCH-POUND TORQUE WRENCH 2 - TORQUE TOOL C-4995A - The shim required for proper bearing preload is the total of end play, plus (constant) preload of 0.18mm (0.007 in.). Never combine shims to obtain the required preload.
- Remove case bolts. Remove clutch bellhousing differential bearing cup. Install shim(s) selected. Then press the bearing cup into clutch bellhousing.
- Install clutch bellhousing. Install and tighten case bolts to 25 N.m (225 in. lbs.).
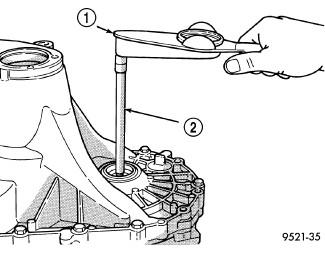
Using Torque Tool (special tool #C-4995A, Tool, Differential Bearing Torque) (2) and an inch-pound torque wrench (1), check turning torque of the differential assembly. The turning torque should be 6 to 12 in. lbs. If the turning torque is too high, install a 0.05 mm (0.002 inch) thinner shim. If the turning torque is too low, install a 0.05 mm (0.002 inch) thicker shim.
- Recheck turning torque (1). Repeat until the proper turning torque is obtained.
Once proper turning torque has been established, place gear case on the end plate. Draw a bead of MOPAR® Gasket Maker, Loctite® 518, or equivalent, on the flat surface of the case mating flange. Install clutch bellhousing onto gear case. Install and tighten case bolts to 25 N.m (225 in. lbs.).
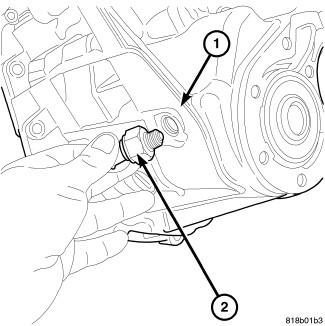
- Install the backup lamp switch (2), tighten switch to 23 N.m (17 ft. lbs.).
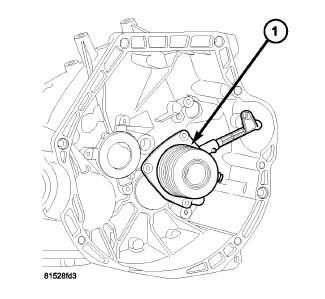
- Install slave cylinder (1) to transaxle using new bolts. Refer to CYLINDER, CLUTCH SLAVE, INSTALLATION .