Cylinder, Clutch Master, RHD: Removal: Removal
WARNING: This page is about a different variant/trim than selected.
- Remove the engine cover.
- Disconnect battery negative cable. Refer to CABLES, BATTERY, REMOVAL .
- Remove front skid plate (if equipped).
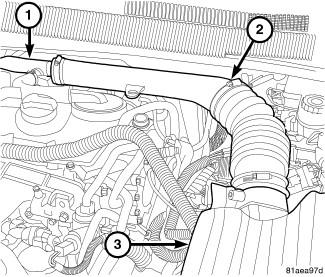
- Remove air intake tube (2) from air cleaner housing (3) and the tube (1) leading down the back of the engine.
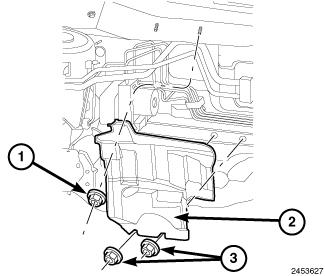
- Remove heat shield upper mounting nut (1) and two lower mounting nuts (3).
- Remove heat shield (2).
 Courtesy of CHRYSLER GROUP, LLCCAUTION:
Brake fluid will damage painted surfaces. If brake fluid is spilled on any painted surfaces, wash it off immediately with water.
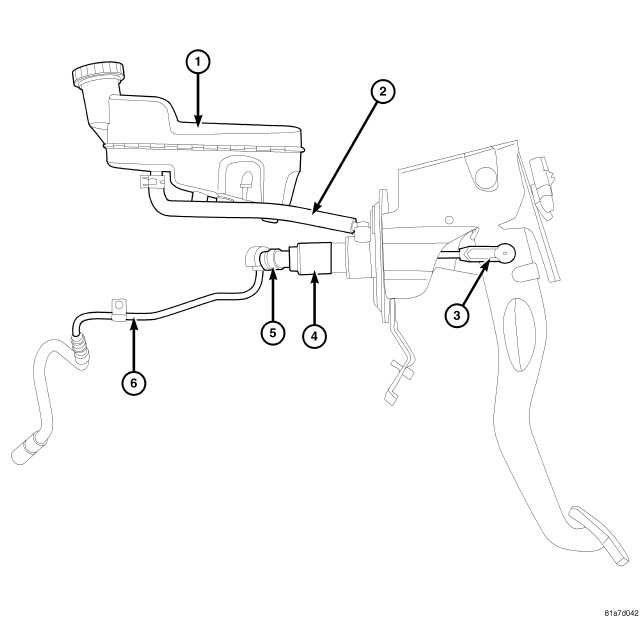
- Disconnect hydraulic tube (6) at the clutch master cylinder pressure line connector (5) by pulling retaining clip then pulling out on tube. Cap off hydraulic tube to prevent fluid loss. To completely drain clutch master cylinder and tubing, remove brake master cylinder cap and drain fluid into suitable container.
- Disconnect hydraulic supply tube (2) at the clutch master cylinder (4).
- Remove lower instrument panel bezel.
- Disconnect clutch master cylinder pushrod (3) from clutch pedal.CAUTION:
Use care when removing clutch master cylinder from engine compartment. Aggressive handling can result in a damaged hydraulic tube and improper clutch release operation upon reassembly.
- Remove master cylinder assembly (4) from mounting position by turning 1/4 turn and carefully remove from engine compartment.