Plate, Carrier: Installation: Installation
 Courtesy of CHRYSLER GROUP, LLC
- Position the wire harness door bracket (2) into the door and install the screws (3).
 Courtesy of CHRYSLER GROUP, LLC
- Position the latch into the door and set the trim module (1) into place.
- Position the four trim hooks (2) and lower the regulator screw (4) into the corresponding slot (3) in the door and seat the trim module fully.
 Courtesy of CHRYSLER GROUP, LLC
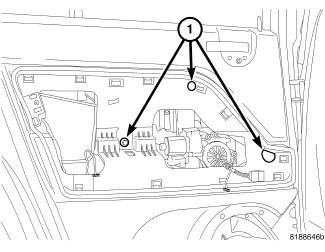
- Install the upper regulator screws (1) and tighten to 6 N.m (53 in. lbs.).
 Courtesy of CHRYSLER GROUP, LLC
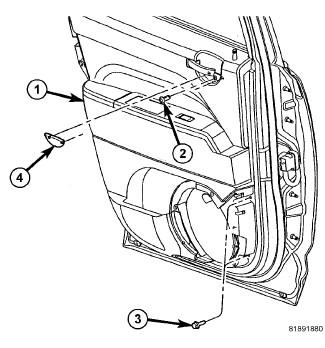
- Install the screws (3) in the front corner and tighten to 6 N.m (53 in. lbs.).
- Install the screw (2) at the inside handle and seat the trim (4) fully.
 Courtesy of CHRYSLER GROUP, LLC
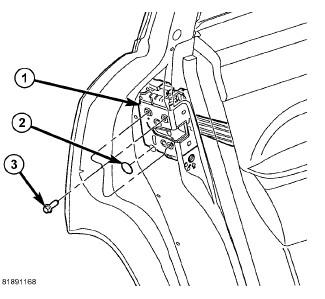
- Install the latch screws (3) and tighten to 7 N.m (62 in. lbs.).
 Courtesy of CHRYSLER GROUP, LLC
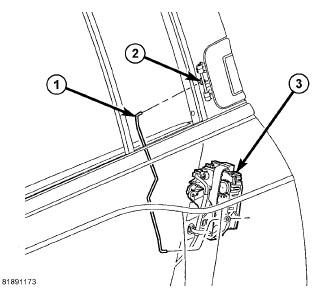
- Connect the exterior handle rod (1) to the latch (3).
 Courtesy of CHRYSLER GROUP, LLC
- Install the speaker (2), Refer to SPEAKER, INSTALLATION
.
 Courtesy of CHRYSLER GROUP, LLC
- Tighten the lower trim screw (2) to 6 N.m (53 in. lbs.).
 Courtesy of CHRYSLER GROUP, LLC
- Release the glass (1) from the tape, connect the glass to the regulator lift plate (2). Ensure that the glass is properly seated.
- Install the rear door trim bolster panel. Refer to PANEL, REAR DOOR TRIM, BOLSTER, INSTALLATION .