Body - Interior & Exterior: Interior: Headliner: Removal: Removal

NOTE:
In the event the headliner is damaged or creased during removal, it will need to be replaced with a new headliner.
- Disconnect and isolate battery negative cable.
- Using (special tool #C-4755, Trim Stick) or equivalent, release the clips (2) and separate the A-pillar trim from the A-pillar.
- Disconnect the electrical connector (3) and release the wire harness support clips (1).
- Remove the two screws that secure the sun visor to the roof panel and remove the sun visor from the headliner.
- If equipped, disconnect the illuminated vanity mirror wire harness connector.
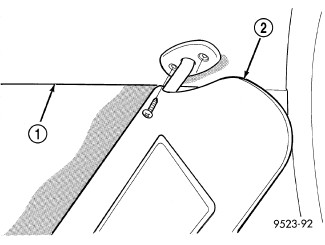
- Remove the screw that secures the sun visor support to the roof panel and remove the support from the headliner.
- Disconnect the rear view mirror (3) electrical connectors (1 and 2).
- Remove the assist handles by using a small pry tool or equivalent, release the assist handle (2) by prying out the clips (3) at either end.
- Fold the rear seats into the down position.
- Press the release buttons and remove the headrests.
- Place the front seats into the recline position.
- From one side of the vehicle, position aside the upper B-pillar trim (1) as necessary. Refer to PANEL, B-PILLAR TRIM, UPPER, REMOVAL .
- From one side of the vehicle, position aside the C-pillar (1) trim as necessary. Refer to PANEL, C-PILLAR TRIM, REMOVAL .
- Remove the push pin fasteners (3) and lower the rear of the head liner.
- Disconnect the dome light (1) electrical connector.
- Disconnect the washer hose, if equipped.
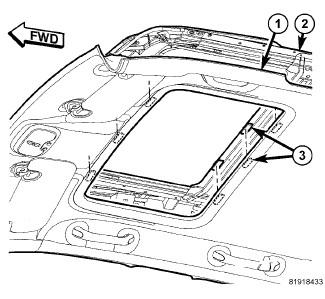
- If equipped with a sunroof, separate the fasteners (3) and lower the headliner (1).
- Disconnect the washer hose, if equipped, and remove the headliner (1) through the rear of the vehicle.