Panel, Instrument: Installation: Installation
- Before proceeding with the following repair procedure, review all warnings and cautions. Refer to INSTRUMENT PANEL, WARNING .WARNING:
Before servicing the steering column the airbag system must be disarmed. Failure to do so may result in accidental deployment of the airbag and possible personal injury. Refer to WARNING .
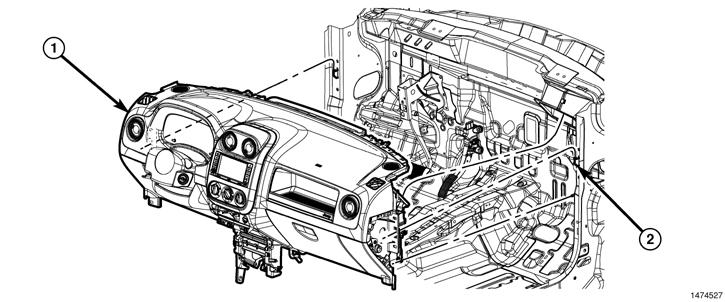
- Install the I/P assembly (1) into the vehicle and position onto the support hooks (4) and alignment pins (5).
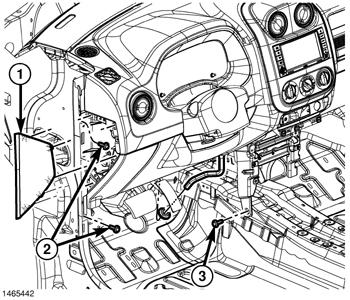
- Install the left side support bolts (4) and tighten to 21 N.m (15.5 ft. lbs.).
- Install the center support bolt (3) and tighten to 21 N.m (15.5 ft. lbs.).
- Install the passenger side support bolts (2) and tighten to 21 N.m (15.5 ft. lbs.).
- Install the fence line bolts and tighten to 21 N.m (15.5 ft. lbs.).
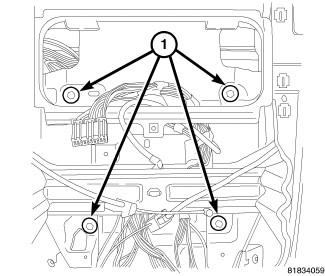
- Install the center I/P to HVAC screws (1).
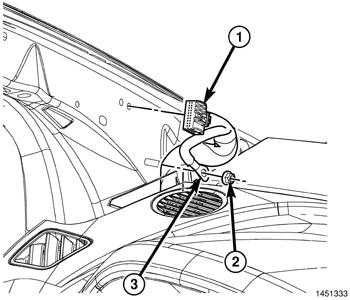
- Connect the wire harness (1) and ground (2) at the A-pillar.
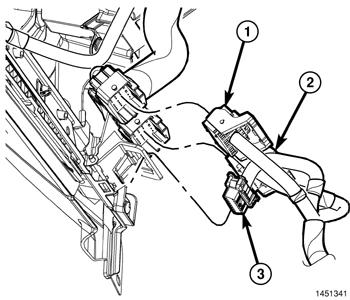
- Connect the main wire harness connectors at the driver's side cowl (1 - 3).
- Install the steering column. Refer to COLUMN, INSTALLATION .
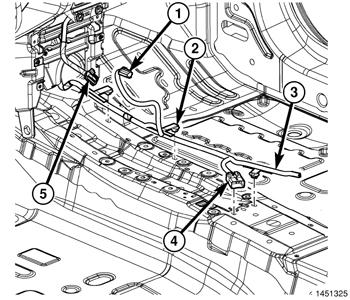
- Position the center wire harness (3) and seat the push pin fasteners (2) fully.
- Connect the HVAC wire harness connectors (1 - 3).
- Connect the radio antenna (2).
- Install the passenger side silencer pad.
- Install the driver and passenger side end caps and seat fully.
- Connect the A-pillar wire harness electrical connector (3).
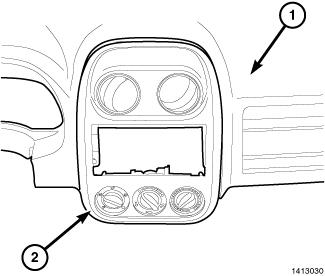
- Place the center bezel (2) into position and connect the electrical connectors.
- Connect the mechanical connections and seat the center bezel fully to the IP (1).
- Install the defroster grille and A-pillar trim panels. Refer to GRILLE, DEFROSTER, INSTALLATION .
- Install the steering column reinforcement (1) and install the screws (2).
- Position the steering column opening cover over the opening and seat the clips fully.
- Install the cowl trim panels. Refer to PANEL, COWL TRIM, SIDE, INSTALLATION .
- Install the shifter assembly. Refer to SHIFTER, TRANSMISSION, INSTALLATION .
- Install the center floor console. Refer to CONSOLE, FLOOR, INSTALLATION .